How To Make a Cardboard Packaging Box?
Most people think cardboard boxes are just… boxes.
But for businesses, especially small brands, they’re often the first impression.
Knowing how to make a cardboard packaging box can save you money and give you full control over how your brand is perceived. It’s not just folding paper; it’s building experience into every edge.
What You Will Need To Make a Cardboard Packaging Box
Before you start folding and cutting, make sure you’ve got the essentials. These are simple tools, but together, they make a professional-looking box that holds up.
Cardboard or Corrugated Sheets
You can use new corrugated sheets for a cleaner look or recycle old boxes if you’re testing or prototyping. Just make sure the material is sturdy enough for your needs.
Measuring Tape or Ruler
The tighter your measurements, the neater the box and the more secure your contents.
Utility Knife or Box Cutter
Sharp blades make clean cuts. Dull ones just ruin your effort (and possibly your fingers). Use with care.
Straight Edge or Metal Ruler
For guiding your cuts and helping you score straight fold lines. Think of it as your design backbone.
Hot Glue Gun or Strong Adhesive
For securing flaps and seams. Hot glue works fast and holds well, especially if you’re planning to pack items with weight.
Pencil or Marker
Mark your dimensions and fold lines clearly. It sounds minor, but skipping this step often leads to crooked folds and wasted materials.
Optional but helpful?
A cutting mat to protect your work surface and avoid accidents.
Steps To Make a Cardboard Packaging Box
Making your own cardboard packaging box may sound like a craft project but if done right, it can match the look and feel of something professionally manufactured. Here’s how to go from flat sheet to functional box, step by step:
Plan and Calculate Dimensions
Start with a basic sketch. Write down the height, width, and depth of the box you need. Use these numbers to figure out the total size of cardboard required, including flaps. If you’re using a pre-made template, fill in those measurements first.
Pro tip: Always add a little extra for seams and overlap, usually around ½ inch per flap.
Prepare Your Cardboard
Lay your cardboard flat. If you’re repurposing a used box, check if some folds already exist that you can use. If you’re starting with a blank sheet, make sure it’s large enough to hold your full template in one piece or consider a 2-piece design if not.
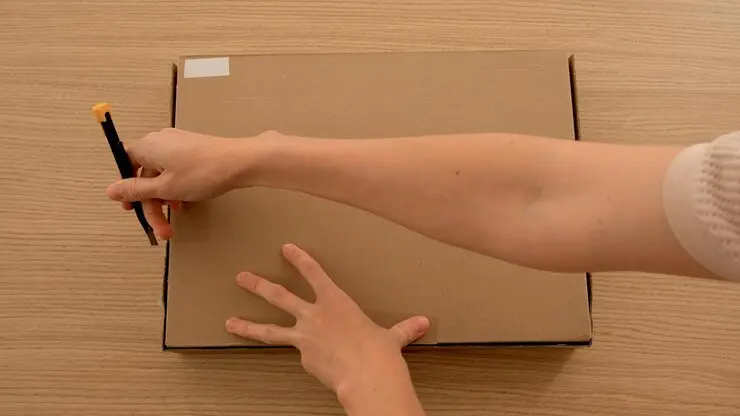
Draw Your Template
Using a pencil and ruler, sketch out your box pattern directly onto the cardboard. Mark solid lines for cuts and dotted lines for folds. Double-check your dimensions. This is the stage where small mistakes can turn into big frustrations later.
Don’t skip this step even if it feels tedious. A little precision here saves a lot of rework.
Cut the Shape
Use a sharp utility knife and straight edge to cut along the solid lines. Keep your hand steady and let the blade do the work (don’t rush!). If you’re using recycled cardboard, cut around any weak spots or old glue seams.
Fold the Edges
Use your straight edge to fold along the dotted lines. Apply gentle, even pressure, and work slowly from one end to the other. Some folds may resist (especially on thick corrugated cardboard) but be patient. A crisp fold gives your box structure and clean lines.
Glue It Together
Time to bring it all to life. Apply hot glue along the tabs and edges, holding each joint in place for a few seconds to secure a clean 90° angle. Build the base first, then the sides, and finally close it up with the top.
Pro tip: If you’re shipping heavier items, reinforce the base with extra glue or even a strip of tape along the seam.
Making a 2-Piece Box (Optional)
Can’t fit your box into one sheet? No problem.
Cut two identical halves of your box layout. Glue one tab of the first sheet to the edge of the second, making sure the line stays straight with your ruler. Once joined, follow the same steps to fold and assemble the full box.
In a Nutshell
Measure carefully.
Cut cleanly.
Fold with precision.
And glue with intention.
Whether you’re building a prototype for your product, shipping something personal, or simply testing ideas, the process gives you full creative control!
But if you’re looking for a more professional finish or need boxes tailored to specific requirements, Packaging Unit offers top-quality custom cardboard and shipping boxes designed to match your exact needs. Let us bring your packaging vision to life—without the hassle.
FAQs
Q: How to make a box out of cardboard template?
Ans: Start by choosing or creating a template based on the size and style of box you need. Draw the template on your cardboard, clearly marking where to cut and where to fold (solid lines for cuts, dotted lines for folds). Use a utility knife and straight edge for clean lines. Once cut, fold along the marked lines and glue the flaps together to form your box. Templates are useful when you need consistent shapes, especially for product packaging.
Q: How to make cardboard packaging from scratch?
Ans: Begin by measuring the dimensions of the item you want to package. Use those to plan the layout of your box on a flat piece of cardboard. Sketch out the shape, cut it out, and fold along the lines to create the walls and flaps. Secure the edges with glue. If you’re working with heavier products, reinforce the bottom and corners. Starting from scratch gives you full control over the size, strength, and design of your packaging.
Q: How to make a cardboard box with lid?
Ans: To make a box with a lid, you can either design it as a single piece with a built-in flap that folds over the top, or create two separate pieces—one for the base and one slightly larger for the lid. Both parts follow the same steps: measure, cut, fold, and glue. The key is to ensure the lid has a snug fit over the base, so add a few extra millimeters to the lid’s dimensions when planning your cuts.

Jennifer James
My specialty is developing cost-effective, attractive, and appropriate packaging for protecting products. I am working with the company to design custom packaging that meets the client’s requirements.
2 Responses